Add a one-off scheduled payment
You can add a one-off (ad hoc) scheduled payment to an existing payment plan — for example a late fee, a partial top-up, or a custom agreed amount. This can be done for a single registration or in bulk across multiple registrations in a class.
Add a payment to a single registration
Use this when you need to add an extra charge to one client's payment plan.
-
Go to Bookings and open the registration.
-
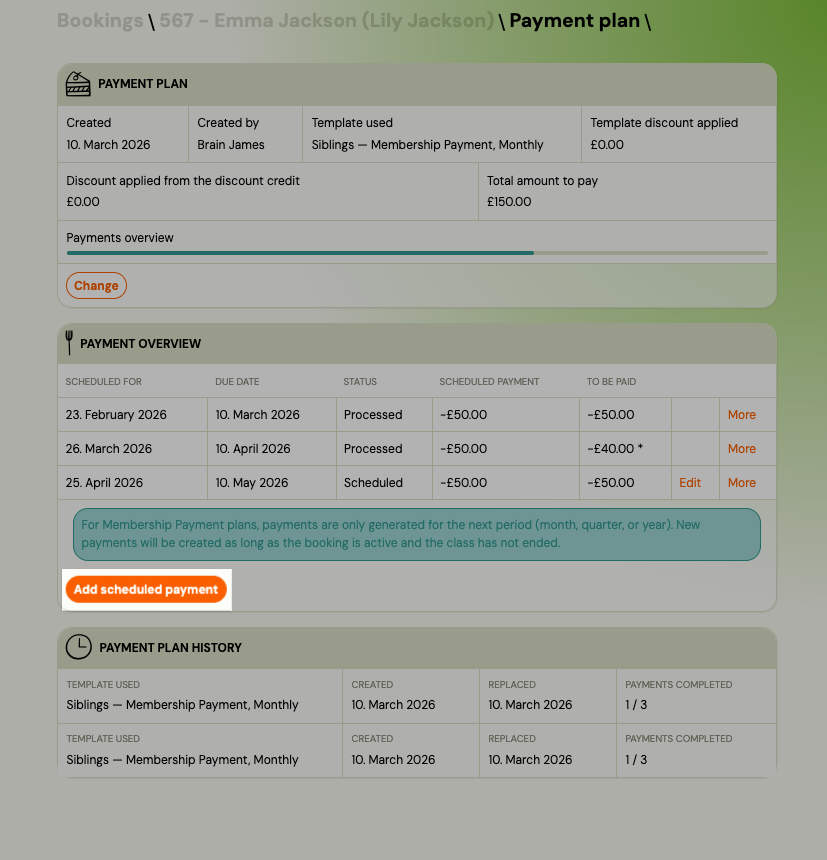
Go to the Payment plan tab.
-
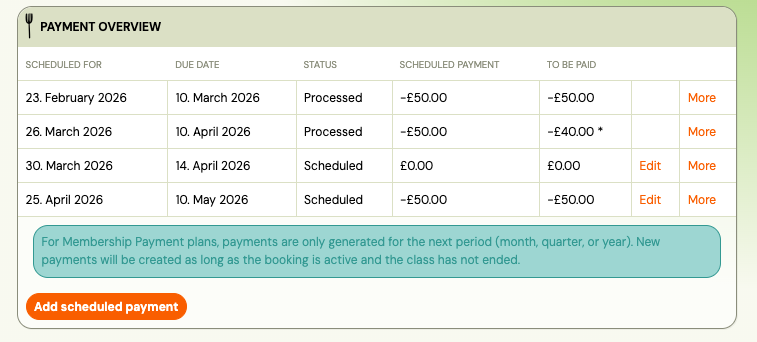
Click Add scheduled payment in the Payment overview card.
-
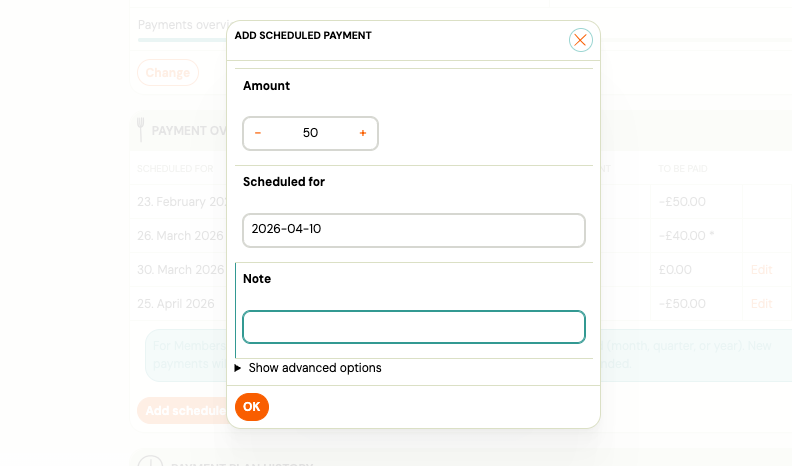
Fill in the payment details:
Field Notes Amount Enter a negative value (e.g. -50). Positive values are rejected.Scheduled at Date the payment is due. Defaults to today. Note Label for this payment. Defaults to "Extra payment". -
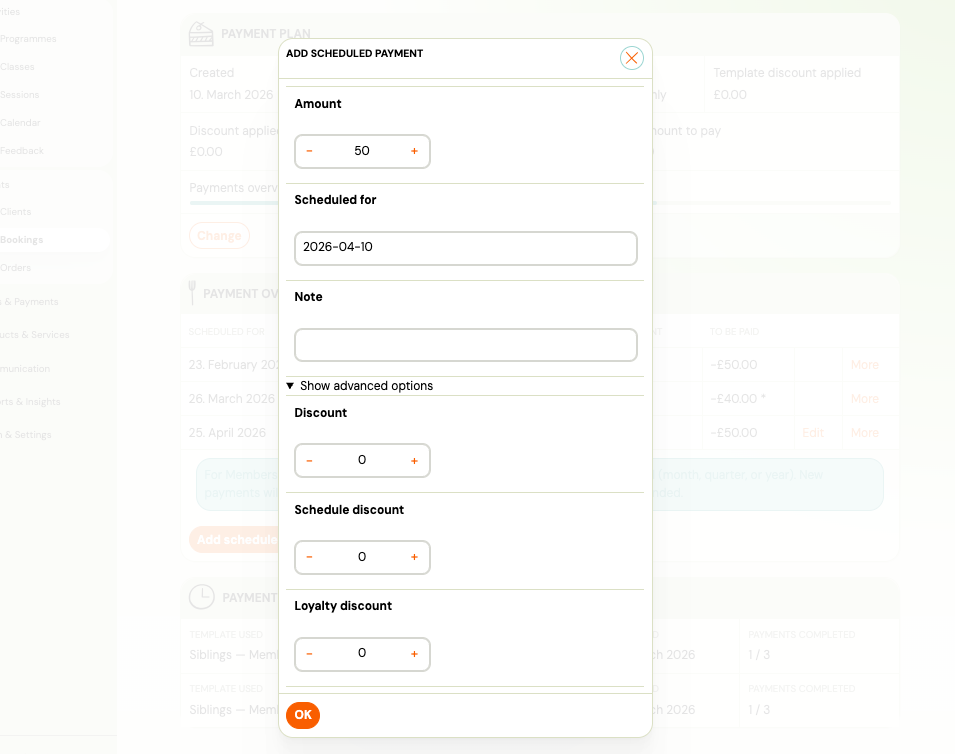
Optionally expand Advanced to set:
Field Notes Due date Date after which an overdue reminder can be sent. Notify at Date to send a payment reminder notification. Discount, Schedule discount, Loyalty discount Discount amounts applied to this payment. -
Click Save.
The new payment appears in the scheduled payments table at its chronological position.
Note: The Add payment button on the booking detail (price card) records a received payment — it is a different action. This guide covers scheduling a future payment obligation.
Add a payment to multiple registrations (bulk)
Use this when you need to add the same extra charge to several clients in a class at once — for example a late registration fee.
-
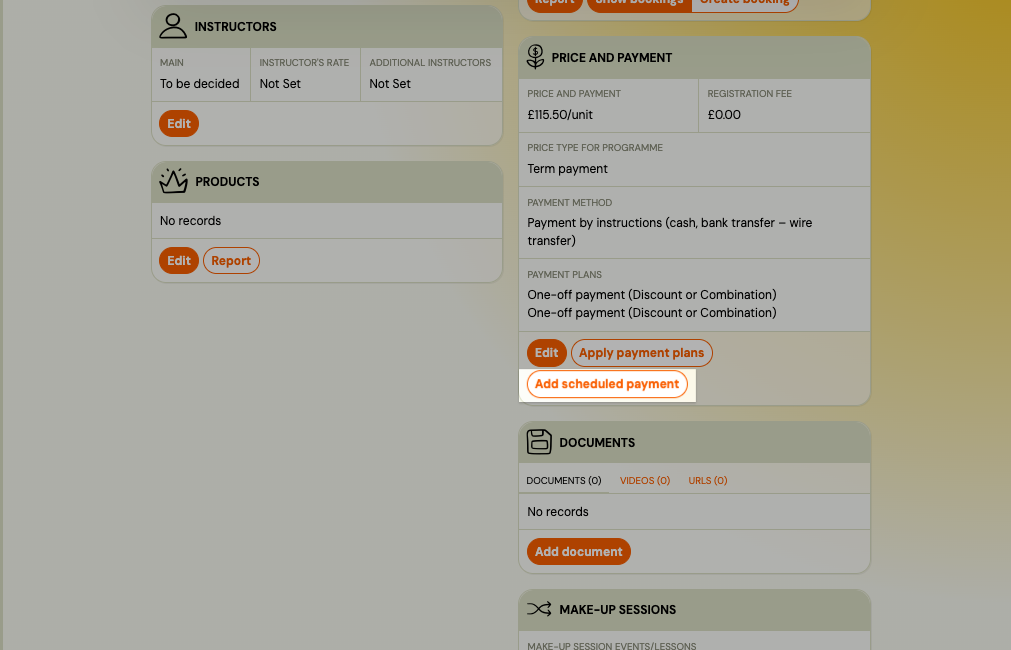
Go to the Class detail page.
-
In the Price and Payment card, click Add payment.
-
Step 1 — Configure: Fill in the payment fields (same fields as the individual form above).
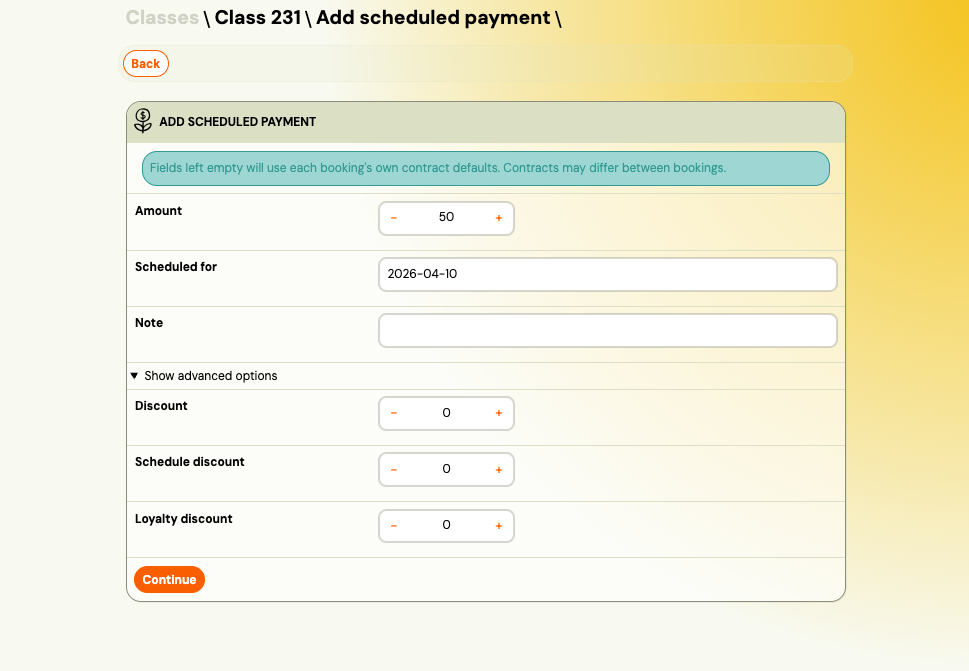
Fields left empty will use each registration's own payment contract defaults. Different registrations in the same class may have different contracts.
-
Click Continue.
-
Step 2 — Select: Choose which registrations to include. Only registrations with an active payment plan are shown.
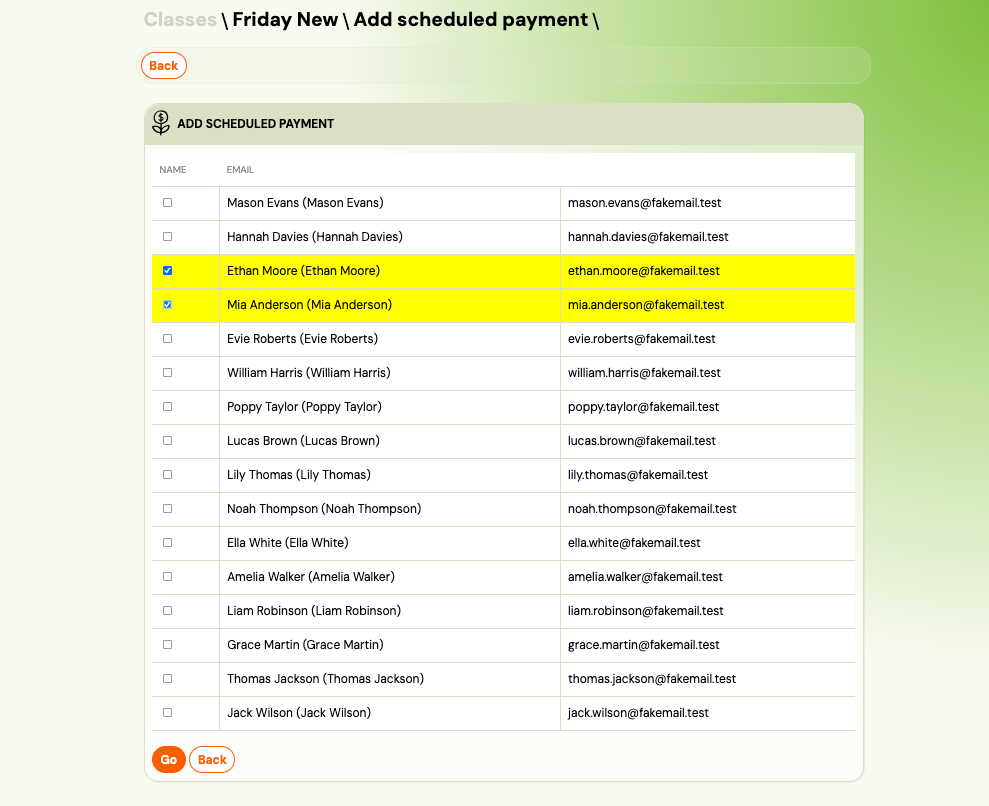
If some registrations are not shown, it means they do not have an active payment plan and cannot receive a scheduled payment.
-
Click Go.
-
Step 3 — Processing: Zooza applies the payment to each selected registration in sequence. Each row shows its status (queued → done / error). Errors on individual registrations do not stop the rest of the batch.
Payment plan history
The payment plan page now shows a history of previous payment plans for each registration, below the active plan.

Each historical entry shows:
| Field | Description |
|---|---|
| Template | Name of the payment plan template that was used. |
| Created | Date the plan was created and by whom. |
| Replaced | Date the plan was replaced (and by whom, if available). |
| Payments | How many payments were completed out of the total (e.g. "3 / 10"). |
Click a historical entry to expand it and see the full scheduled payments table from that plan (read-only).
Admin note
Both the active plan and historical plans have an editable Admin note field — use it to record context such as why a plan was changed or what was agreed with the client.
- Click Edit next to the note field.
- Type your note and press Enter or click away to save.
Why is the first instalment different from the others?
If the first instalment on a payment plan is a different amount than the rest, it is almost always a pro-rated (alikvotný) payment.
When a client registers mid-billing period, Zooza calculates the first payment proportionally — the client pays only for the days remaining in that period, not the full month or term fee.
Example: A class costs €60/month. A client registers on the 15th of March. The first instalment is €30 (half of March), and from April onwards the full €60/month applies.
The pro-ration calculation depends on your billing profile settings:
- The billing period start date (e.g., 1st of each month)
- The registration date
- The pro-ration method (calendar days or session-based)
To review or adjust how pro-ration is configured, go to Settings → Billing profiles and check the Pro-rated payment settings for the relevant billing profile.
If you do not want pro-ration and prefer all clients to pay the full amount regardless of when they register, disable the pro-rated payment option in the billing profile.
Can I change the amount on an existing payment plan?
You cannot edit the amounts in an existing active payment plan directly. The options are:
- Add an ad-hoc payment (this guide) — to charge or credit an additional amount without changing the existing scheduled payments.
- Replace the payment plan — go to the registration's Payment plan tab, click Replace plan, and select a new template or configure custom amounts. The old plan moves to history.
- Edit individual scheduled payments — in the scheduled payments table, you can click on a future (unpaid) payment and manually adjust its amount or due date.
Related
- Payment tile on booking — overview of the payment card on a registration.
- Payment options — types of payments and how they work.
- Billing and invoicing setup — billing profiles, pro-ration settings.
- Payments and billing FAQ — common questions.