Send Email
The Send Email screen lets you compose and send email messages to clients. Bulk sends are processed in the background — Zooza shows you the exact recipient count before sending starts and tracks delivery progress in real time.
Navigation: Go to Communication → Send message.
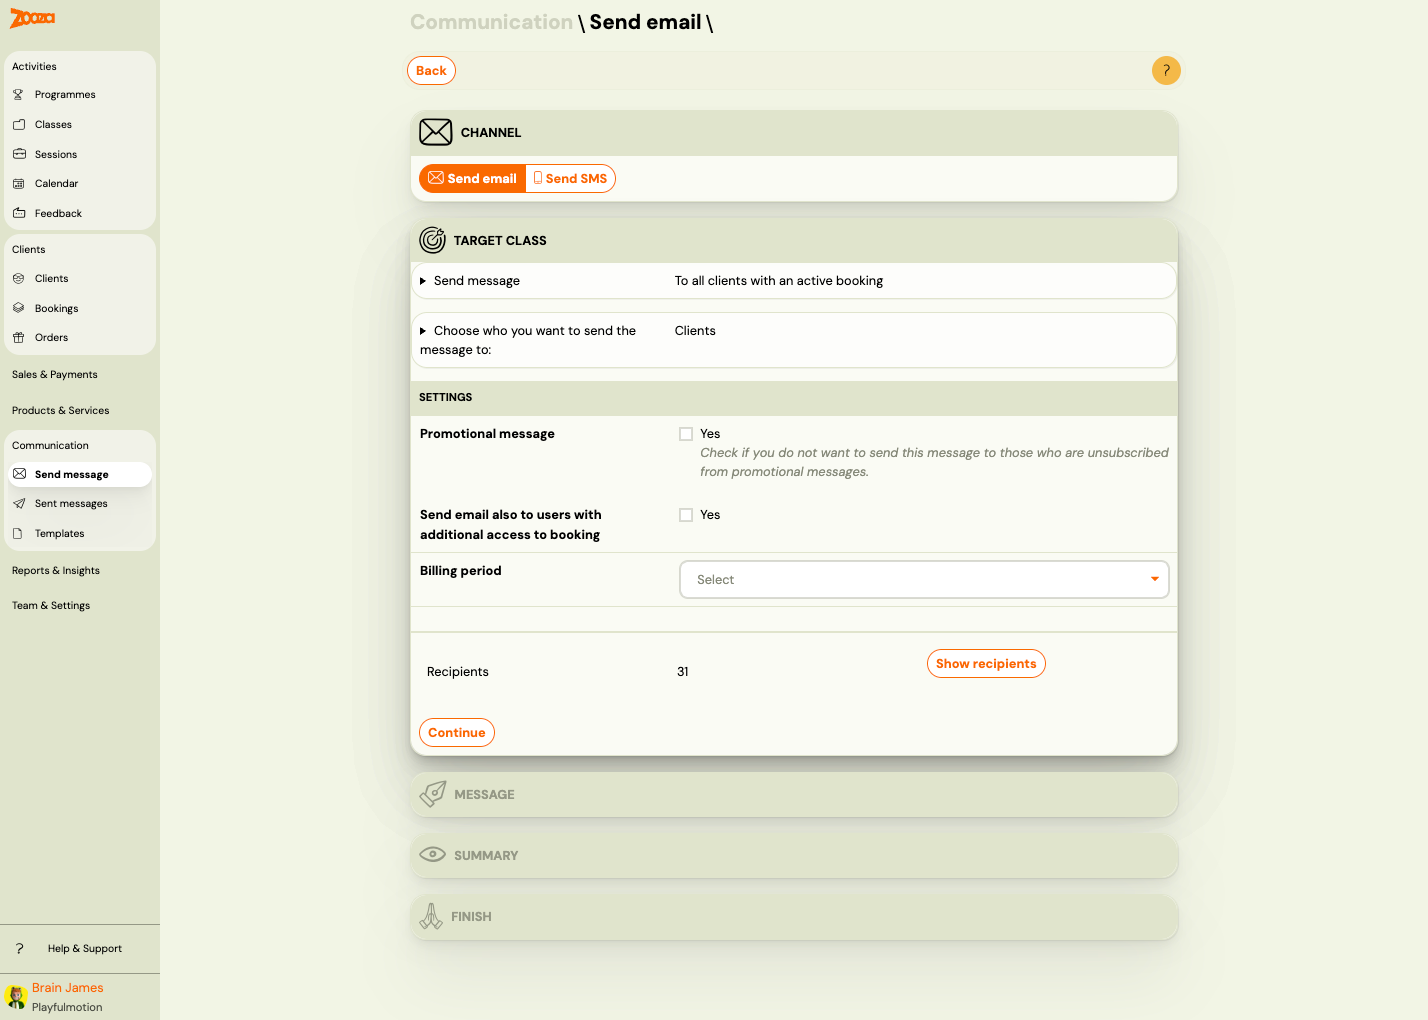
Step 1: Target
Send Message
Choose who receives the email:
| Option | Description |
|---|---|
| To all clients with an active booking | Sends to all clients in the selected billing class with status "Enrolled". |
| To all clients | Sends to all clients regardless of bookings or billing periods. |
| To a specific class | Sends to all clients in the selected class with status "Enrolled". |
| To a single recipient | Sends to a single email address only. |
| To selected bookings | Sends to a manually selected set of bookings. |
Choose Who You Want to Send the Message To
| Option | Description |
|---|---|
| Clients | Message is sent to each client just once. If the client has multiple bookings, merge fields specific to a booking (such as COURSE_PRICE or VARIABLE_SYMBOL) cannot be used. Best for general announcements. |
| Individual bookings | Message is sent to each booking that meets the criteria. If a client has multiple bookings, they receive one email per booking. Best for messages about specific bookings. |
Settings
| Field | Description |
|---|---|
Promotional message | Check Yes if you do not want to send this message to clients who have opted out of promotional messages. |
Send email also to users with additional access to booking | Check Yes to also send to users with shared access to the booking. |
Billing period | Dropdown to select the billing period (e.g. "Ongoing Classes"). |
Recipients
Shows the count and list of recipients matching your criteria.
| Column | Description |
|---|---|
Name | Client (parent) name. |
Child | Child name associated with the booking. |
| Remove | Remove the recipient from this send. |
Use Show recipients / Hide recipients to toggle the recipient list.
Click Continue to proceed to the Message step.
Step 2: Message
Compose the email content. This step uses the rich text editor (same as the template editor — see Template Editor).
Step 3: Summary
Review recipients, message content, and settings before sending. Click Continue.
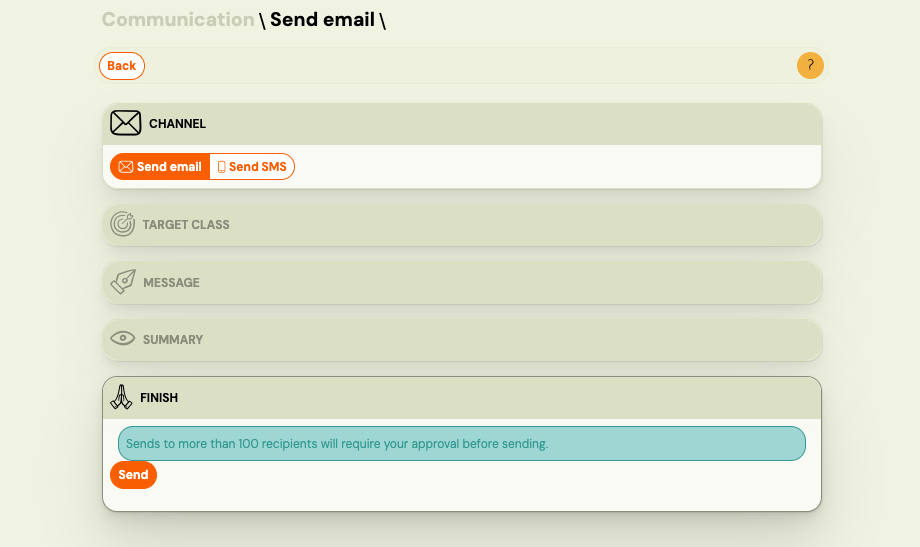
Step 4: Approval and sending
When you confirm the send, Zooza creates a message job — it counts the exact recipient list and breaks it into chunks for background processing.
Approval gate
Sends to 100 or more recipients require explicit approval before any emails are dispatched.

| Status shown | What it means |
|---|---|
| Pending approval | Job created, waiting for you to approve. No emails sent yet. |
| Approve button | Click to start sending. |
| Cancel button | Abandon the send entirely. |
Sends under 100 recipients are approved automatically and start immediately.
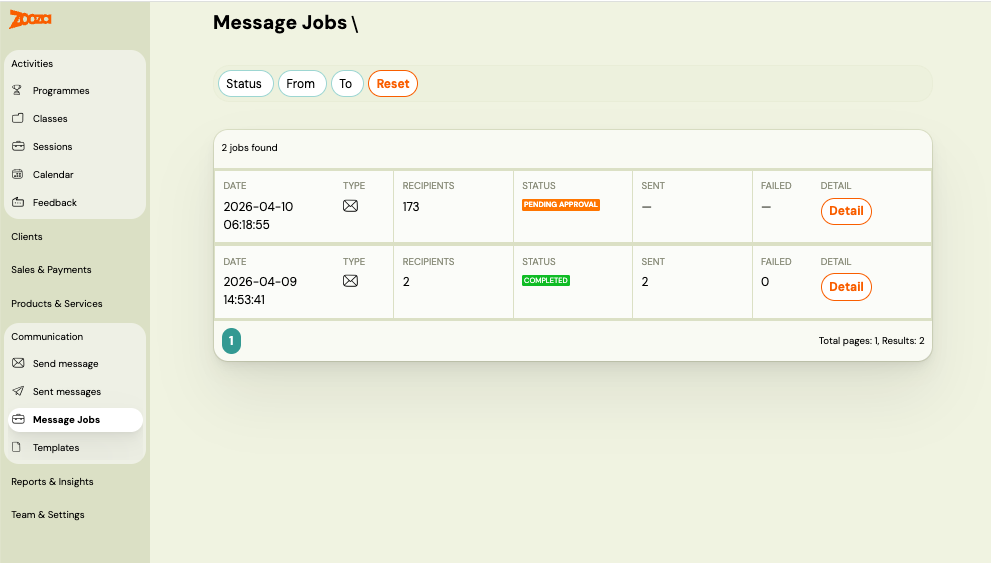
Progress view
Once approved (or auto-approved), Zooza processes the send in the background. The progress view shows:
| Field | Description |
|---|---|
| Status | Current job status: Queued, Sending, Completed, or Failed. |
| Recipients | Total number of recipients in this send. |
| Sent | Recipients successfully handed off to the mail gateway. |
| Failed | Recipients that could not be processed. |
| Queued | Job is waiting because another send for your account is already in progress. |
Only one bulk send can be active per account at a time. If you start a second send while the first is still running, the second enters the queue and starts automatically when the first completes.
Cancellation
You can cancel a send that is in progress. Chunks already sent cannot be recalled, but unsent chunks are stopped.
Click Cancel on the progress view to stop the send.
Related
- Communication — Communication menu overview.
- Message Templates Reference — manage reusable templates.
- Sending Email/SMS Guide — step-by-step instructions.
- Bulk Send Tracking — understanding job statuses, queue, and send history.
- Dynamic Tags Guide — available merge fields for templates.
- Email Communication FAQ — common email questions.