Personas
Personas is a feature that distinguishes between attendees and clients, giving each their own dedicated profile. Instead of treating a child (or other attendee) as just an extra field on a booking form, Personas creates a full record for them — complete with progress notes, order history, and family relationships. This provides a clearer, more detailed overview of each person’s engagement, helping you track their journey and interactions over time.
Person creation
Person can be created in 2 ways:
- Automatically during booking
- Manually within the application
There are 2 types of persons you can work with:
- Client – the email address used to create the booking
- Attendee – the person who actually attends the programme
Example: In children’s programmes, the client is typically the parent, while the attendee is the child.
Automatic creation
When a person is created automatically during booking, the system follows these rules:
- The person who enters the email and basic details is always the Client.
- The Client is also an Attendee unless the programme requires the Full Name and/or Date of Birth fields.
- If the Client is not attending (e.g., a parent registering a child), they must fill in the additional fields including Full Name and/or Date of Birth for each Attendee.
Manual booking
Sometimes an administrator may need to manually register a client for a programme. To do this, follow these steps:
- Select the class you want to register the client for.
- Choose the client type:
- Existing client - search for the client in the search box and click on their name
- New client - enter their email address and click *Continue *to create a new booking
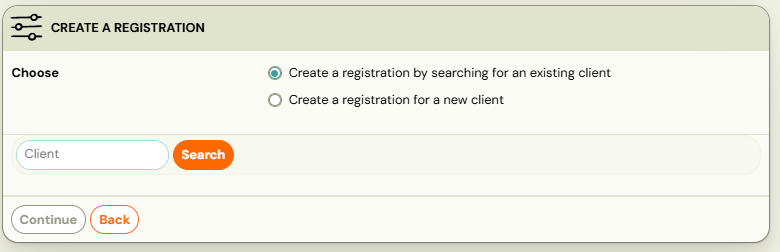
If registering an existing client:
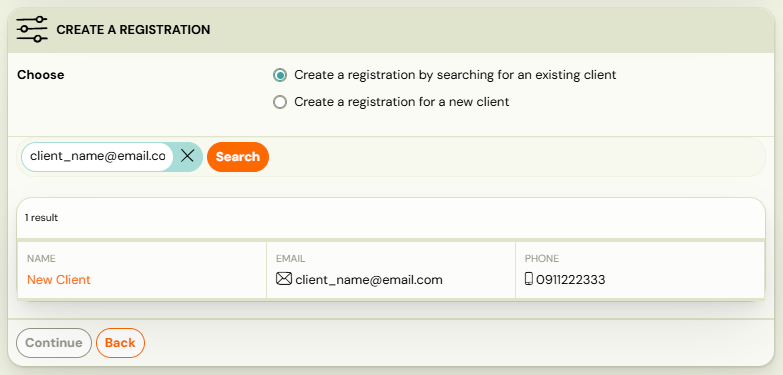
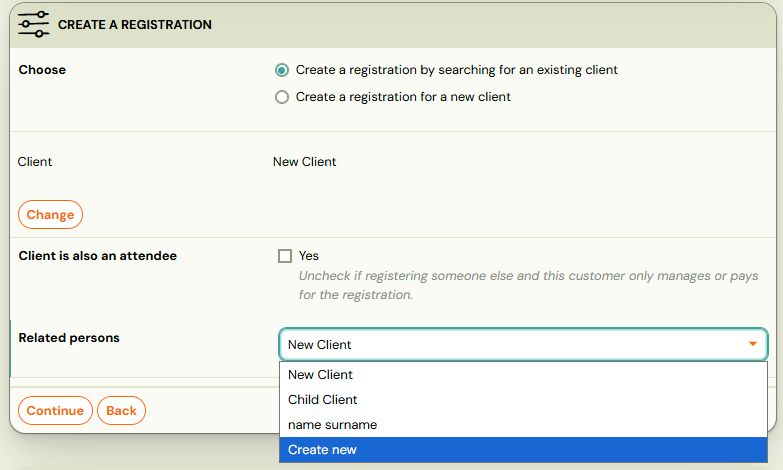
- Select who will be the attendee — the client themselves or another person linked to their email address.
- If the attendee is not yet in Zooza, select Create New, fill in the required fields and click Continue
If registering a new client:
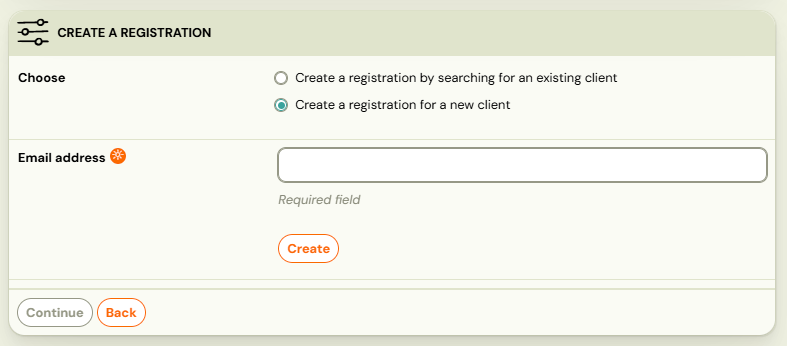
- Fill in all required fields for the new client
- Choose who will be the attendee - the client or another person
- If the client is not attendee, uncheck the Client is also an attendee box and enter attendee’s first and last name.

- Click Continue.
Change of attendee
If a booking has the wrong attendee, you can update it in the Booking Detail view.
- In the Attendee tile, click Change to select a different attendee for the booking.
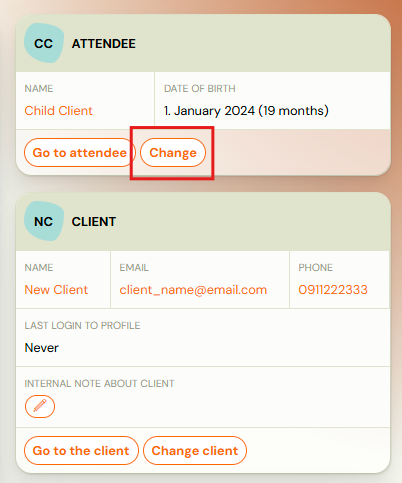
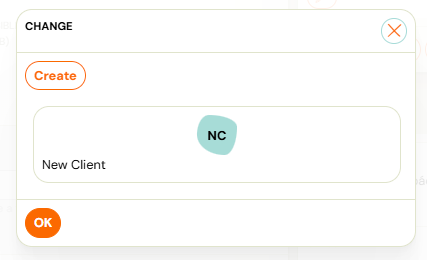
- If the correct attendee already exists in Zooza, select them from the list.
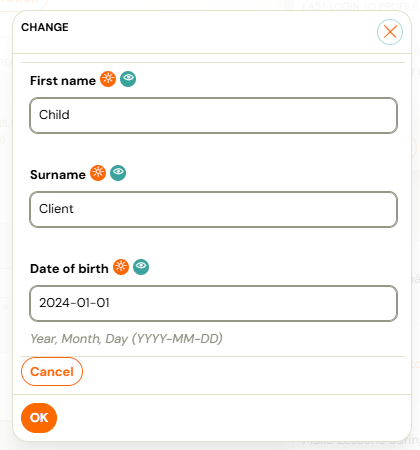
- If the attendee does not yet exist in Zooza under this email, click Create, fill in the required fields for the new attendee, and then click OK.
Make an attendee a client
A child registered by a parent has no login of their own. When they outgrow that — the classic case is a teenager turning 18 who wants to manage and pay for their own bookings — you can give them their own login and move the client role onto them.
Account owner only. Other roles do not see the action, and cannot reach it by URL either.
You can start it from either end:
- the attendee tile on a booking, or
- the person card on a client detail page.
Both open the same screen, Make this attendee a client.
Doing it
- Enter the Email this person will log in with. Phone is optional.
- Tick the Bookings that should move to them. Every booking where they are currently the attendee starts ticked — including ones in other classes, because the change belongs to the person, not to a single booking. At least one must stay ticked.
- Click Preview changes. Nothing has happened yet: you get a row per booking showing Current client and New client, so you can see exactly who is losing the role and who is gaining it.
- Click Confirm.
What happens depends on the email
This is the part worth reading before you type an address, because Zooza treats the four cases quite differently:
| The email you entered | What happens on Confirm |
|---|---|
| Is not in use anywhere | The account is created straight away and the bookings move. No email is sent to the attendee — nothing lands in their inbox until they ask for a login themselves. |
| Already belongs to an account in your company | Nothing changes yet. The owner of that address is emailed and has to confirm. |
| Belongs to an account outside your company | Same — nothing changes until they confirm. Check the address carefully first; Zooza will not tell you whose account it is. |
| Is already this person's own login | Only the client role moves. No confirmation needed. |
Because a mistyped address in the first case creates a working account at the wrong address, read the email back before confirming.
While a confirmation is outstanding
A booking waiting on confirmation shows Waiting for email confirmation, with the expiry date and how many bookings are queued to move. Nothing has changed yet — the current client keeps the role until the person clicks the link in their email.
If you got the address wrong, or the person never confirms, use Cancel request and start again.
What does not move
- Debt stays with the booking. The client role moves forward from here; outstanding balances and invoices already issued are not re-attributed to the new client. Zooza does not rewrite billing history.
- You cannot change the email of someone who already has a login from this screen. It is for giving an identity to someone who has none.
Client Card
To view a client (whether the registrant or attendee) in full detail, Zooza provides a Client Card. This feature lets you see the client’s complete history — including bookings, orders, credits, and notes written by instructors during attendance. You can also edit the client’s information or merge duplicate client cards if necessary.
Access a Client Card
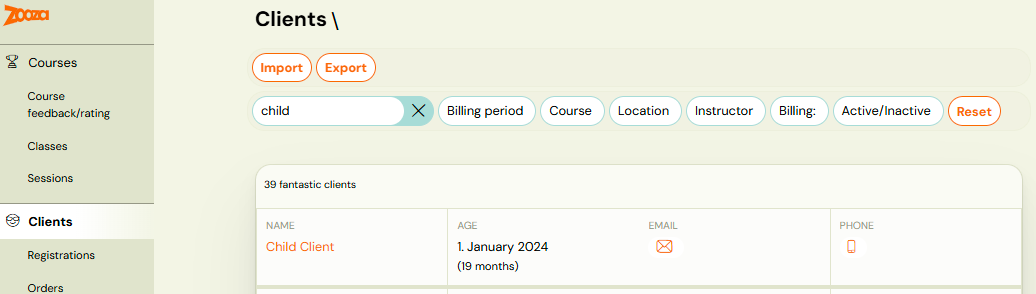
- Go to the Clients tab and search for the client by name, email, or other details.
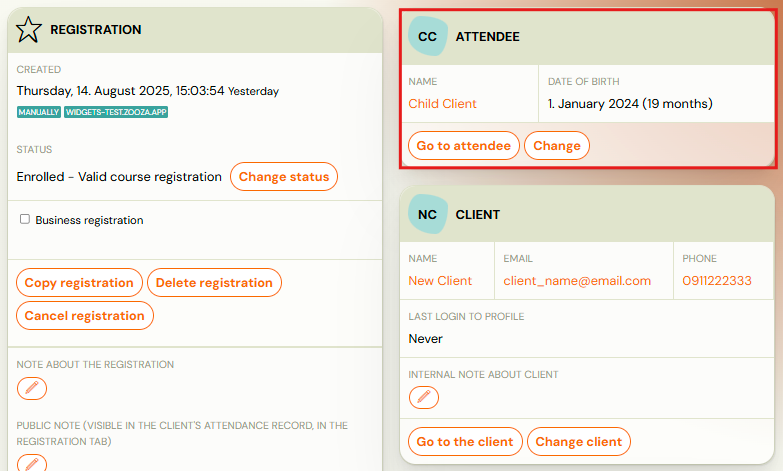
- From a booking detail page, click the Go to Attendee button.
Client Card detail
Once in the Client Card, you can:
- Edit client information by clicking Edit in the tiles containing basic details.
Note: This action can only be performed if the Client is not the same as the Attendee. If they are the same person, you must submit a new request, which will need to be approved by Zooza.
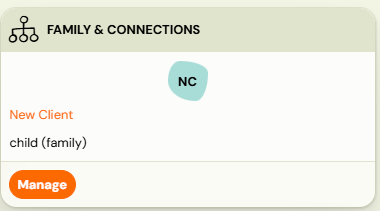
- Manage family & connections by creating or editing relationships between clients.
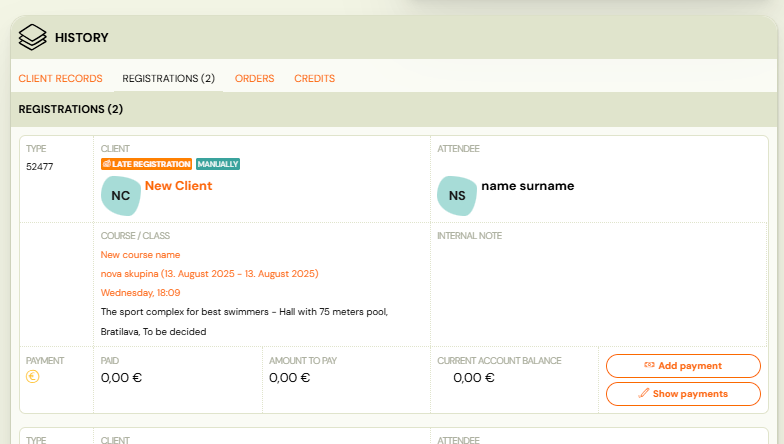
- View History, which includes all internal notes, a list of bookings, orders, and a credit overview.
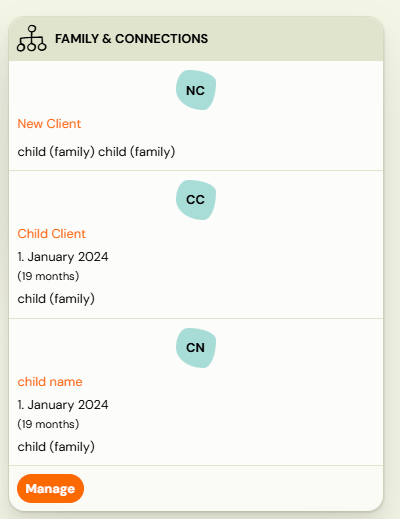
Family & Connection
Each client or attendee can be linked to other people in Zooza (e.g., Parent–Child, Guardian, Spouse).
To manage relationships, open the person’s Client Card and click Manage in the Family & Connections section.
Merge Profiles
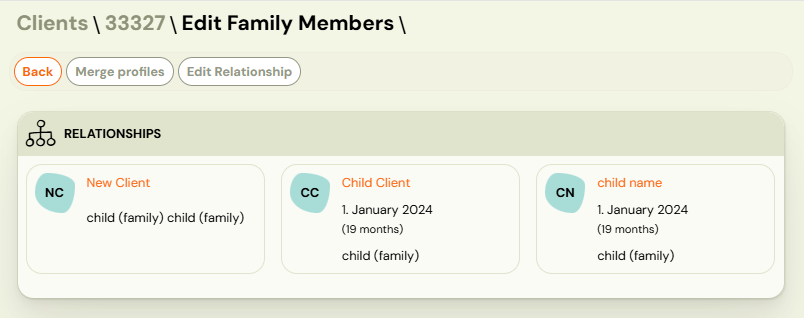
If you find duplicate records for the same person, you can merge them into a single profile.
-
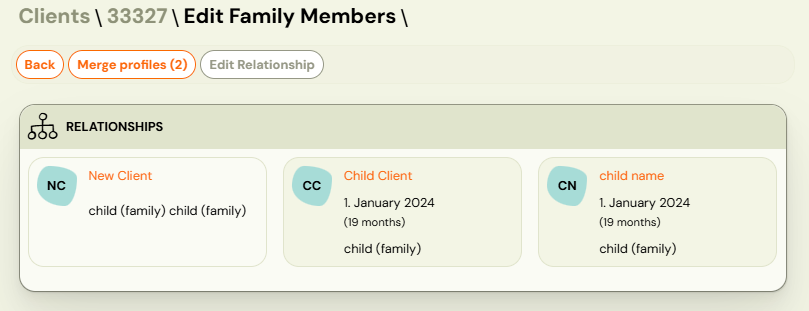
Select all duplicate entries and click Merge profiles
-
Select the main person to keep as primary to merge records together
-
Click Save to complete the merge.
Tip: Before saving, review names, contact details, and other fields so the main profile reflects the correct information.
Edit relationship
If a relationship was created incorrectly, you can update it.
- In Family & Connections, select the member whose relationship you want to change and click Edit Relationship.
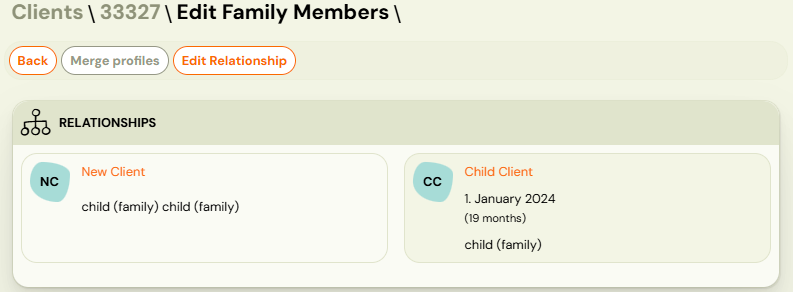
- Choose the correct relationship from the drop down lists (e.g., Parent, Child, Guardian, Spouse).
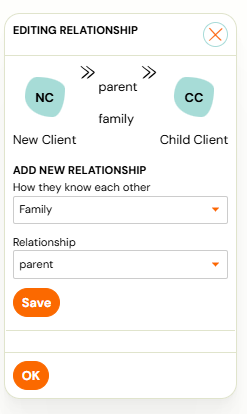
- Click Save, then *OK *to confirm.
Client records
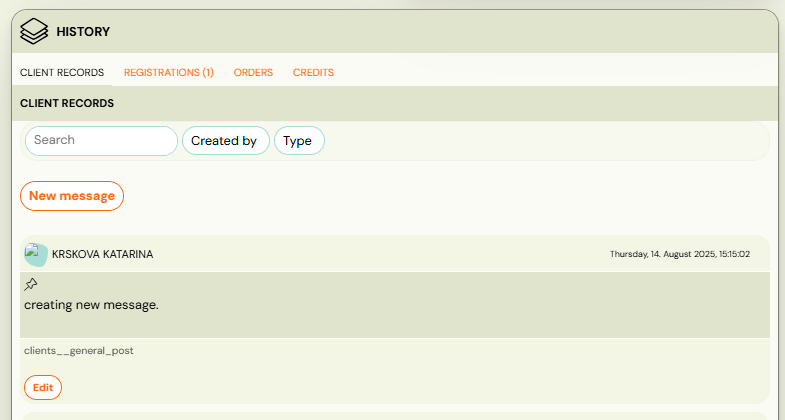
Attendance page includes a feature button for all attendees where it is possible to write a internal note about that session - e.g. progress on the session, homework, etc. addressing only the one particular attendee.
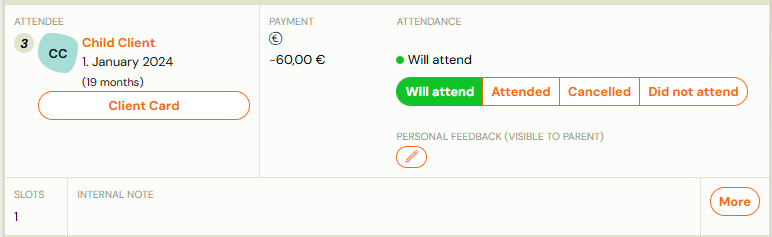
By clicking on the Client Card button you will see the full overview of client records created by instructors for a better understanding.
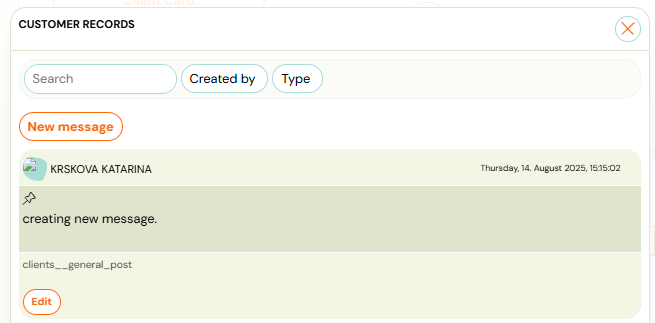
You can search in the notes or create a new one by clicking the New Message button. When creating a new message that is important for all instructors and admins, you can pin the message by ticking the checkbox.
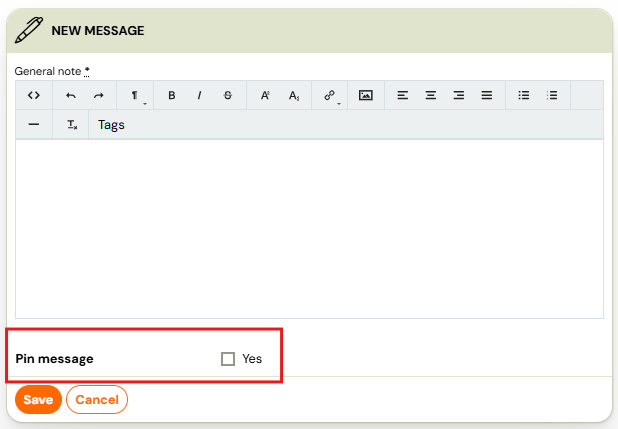
Info: All messages created during attendance are visible in the client card in client's detail.