Creating entry passes
Entry passes let clients prepay for a set number of sessions or a credit amount, which is then redeemed each time they book a session in a Pay-as-you-go programme. Entry passes are optional — without them, clients simply pay per session.
Entry pass vs Prepaid credit
Zooza supports two types of prepaid products:
- Entry pass — A visits-based pass. The client purchases a fixed number of entries (e.g. 10 sessions). Each time they book a session, one entry is deducted.
- Prepaid credit — A money-based pass. The client purchases a credit amount (e.g. 50 EUR). Each time they book a session, the session price is deducted from their credit balance.
Both types work the same way in the booking flow. Choose based on whether you want to sell by number of visits or by monetary value.
Step-by-step: Create an entry pass product
-
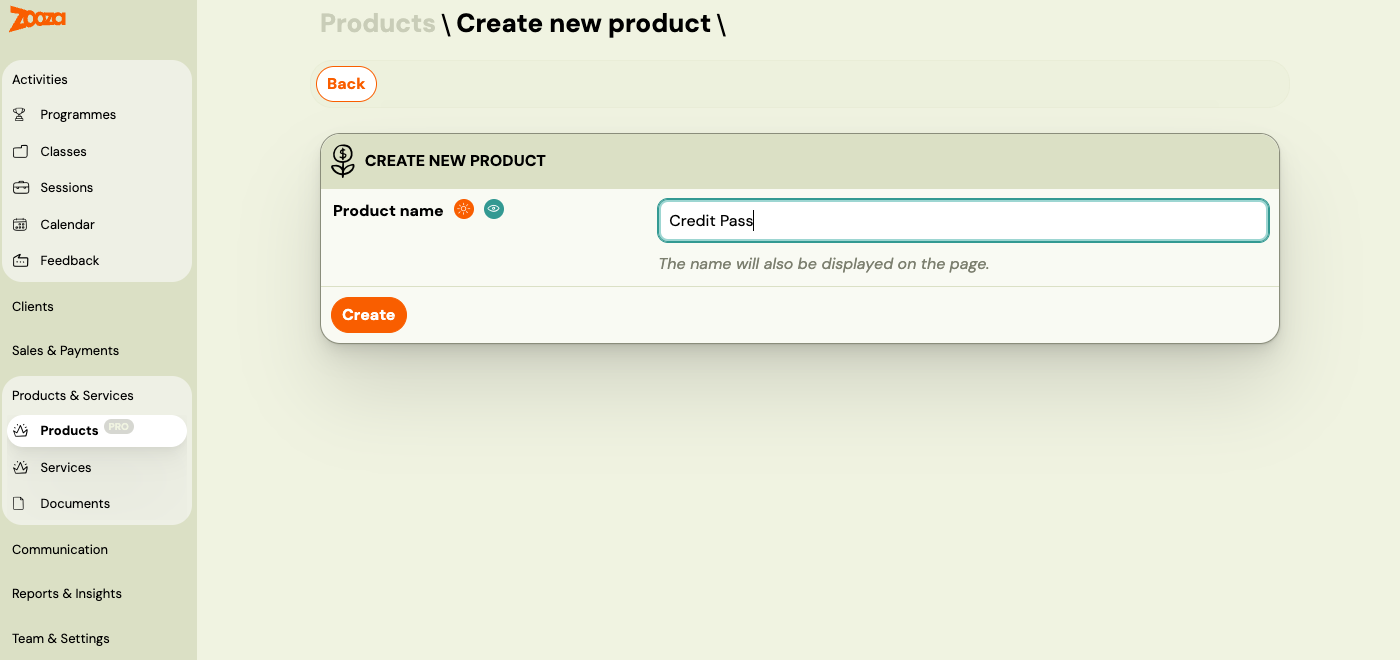
Go to Products → Create New Product → Create.
-
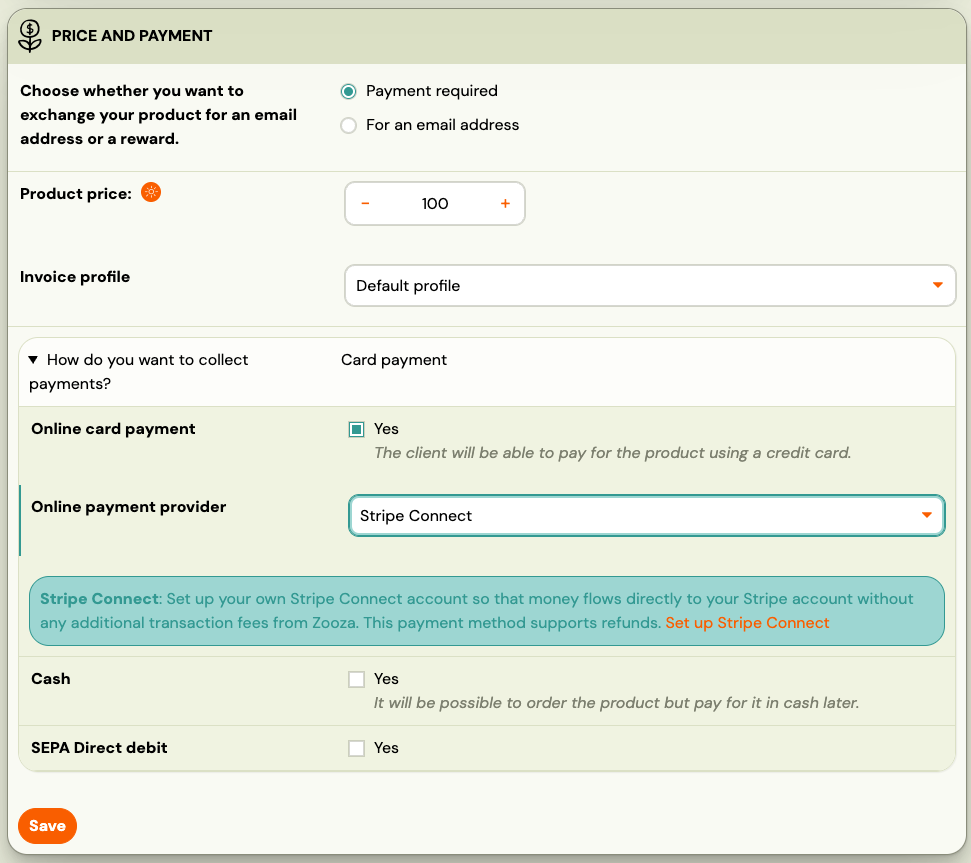
Enter the credit value, configure payment methods (online payment, bank transfer, cash, etc.) and save.
-
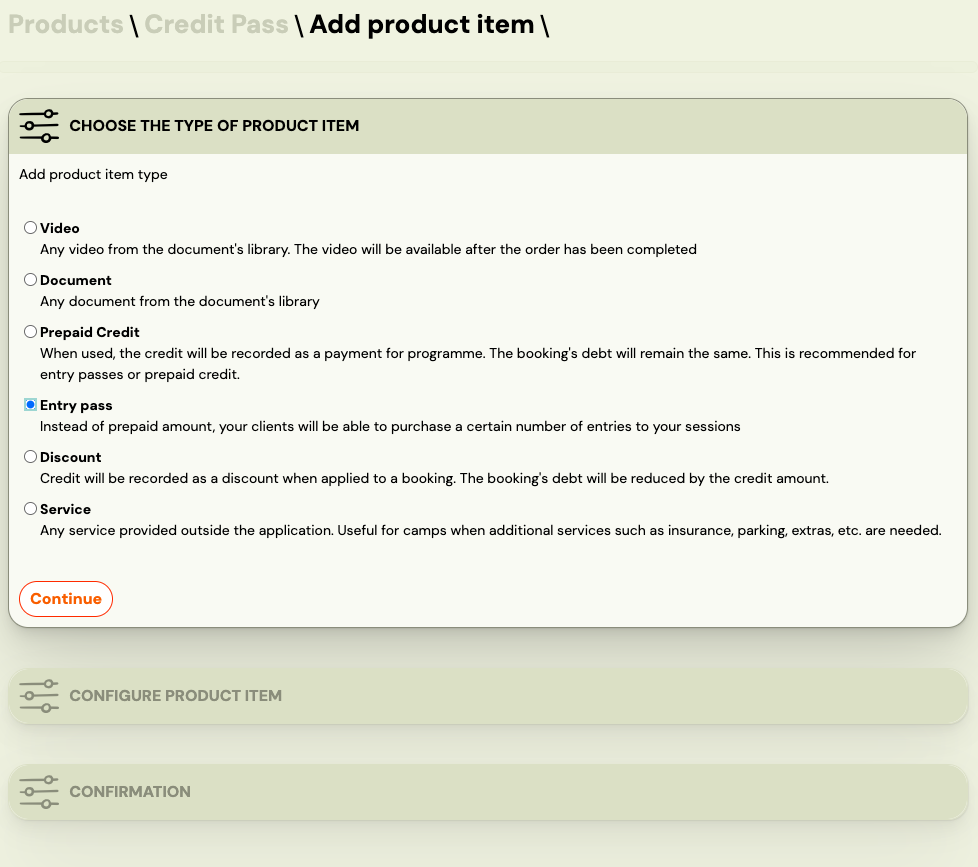
Go to Items for sale → click Add.

-
Select Entry Pass as the item type.
-
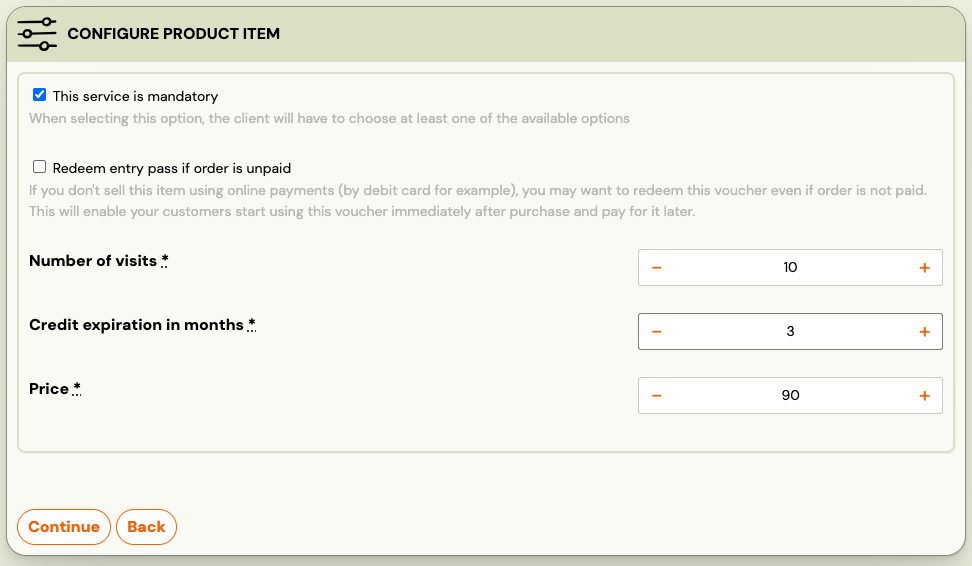
Set the value (number of entries or credit amount), validity period, price, and whether the item is mandatory.
-
To offer a discount, set the price lower than the value (e.g. 10 entries for 80 EUR instead of 100 EUR).
-
Click Continue → Start and Continue.
-
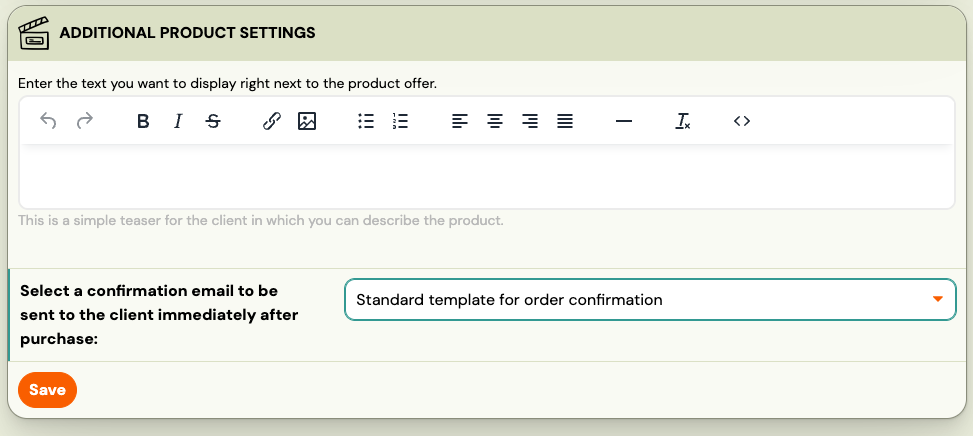
Add a description and notification template if needed.
Assign pass to a class
After creating the entry pass product, assign it to the relevant programme or class.
-
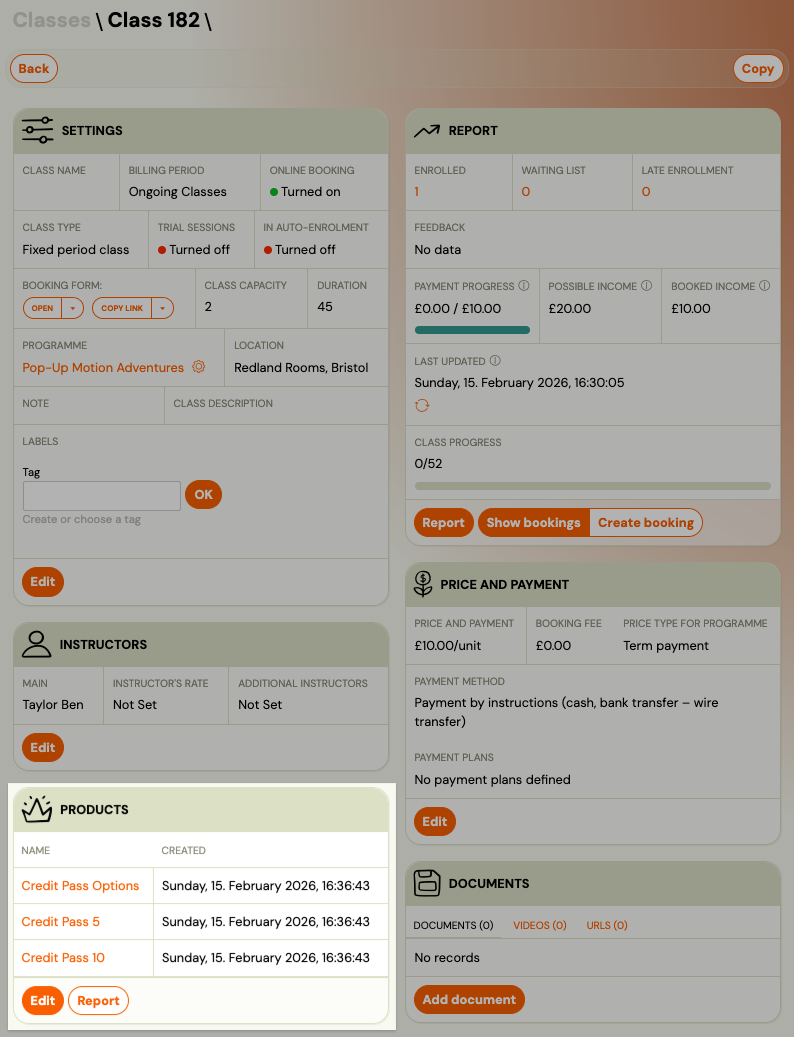
Go to the Programme → Class → Select Product.
-
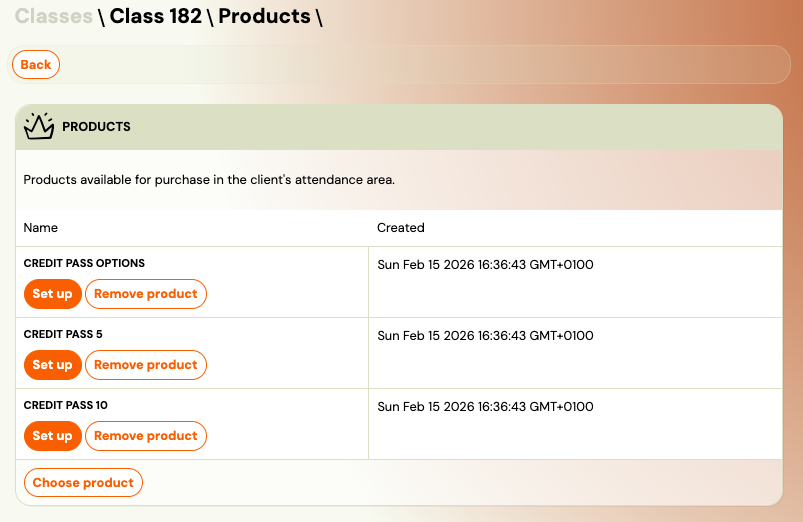
Choose the entry pass product you created.
-
Click Save.
You can assign multiple pass types to the same class. For example, you might offer both a 5-session pass and a 10-session pass.
Product settings per class
Click Set up on the product row to open its settings for this class:
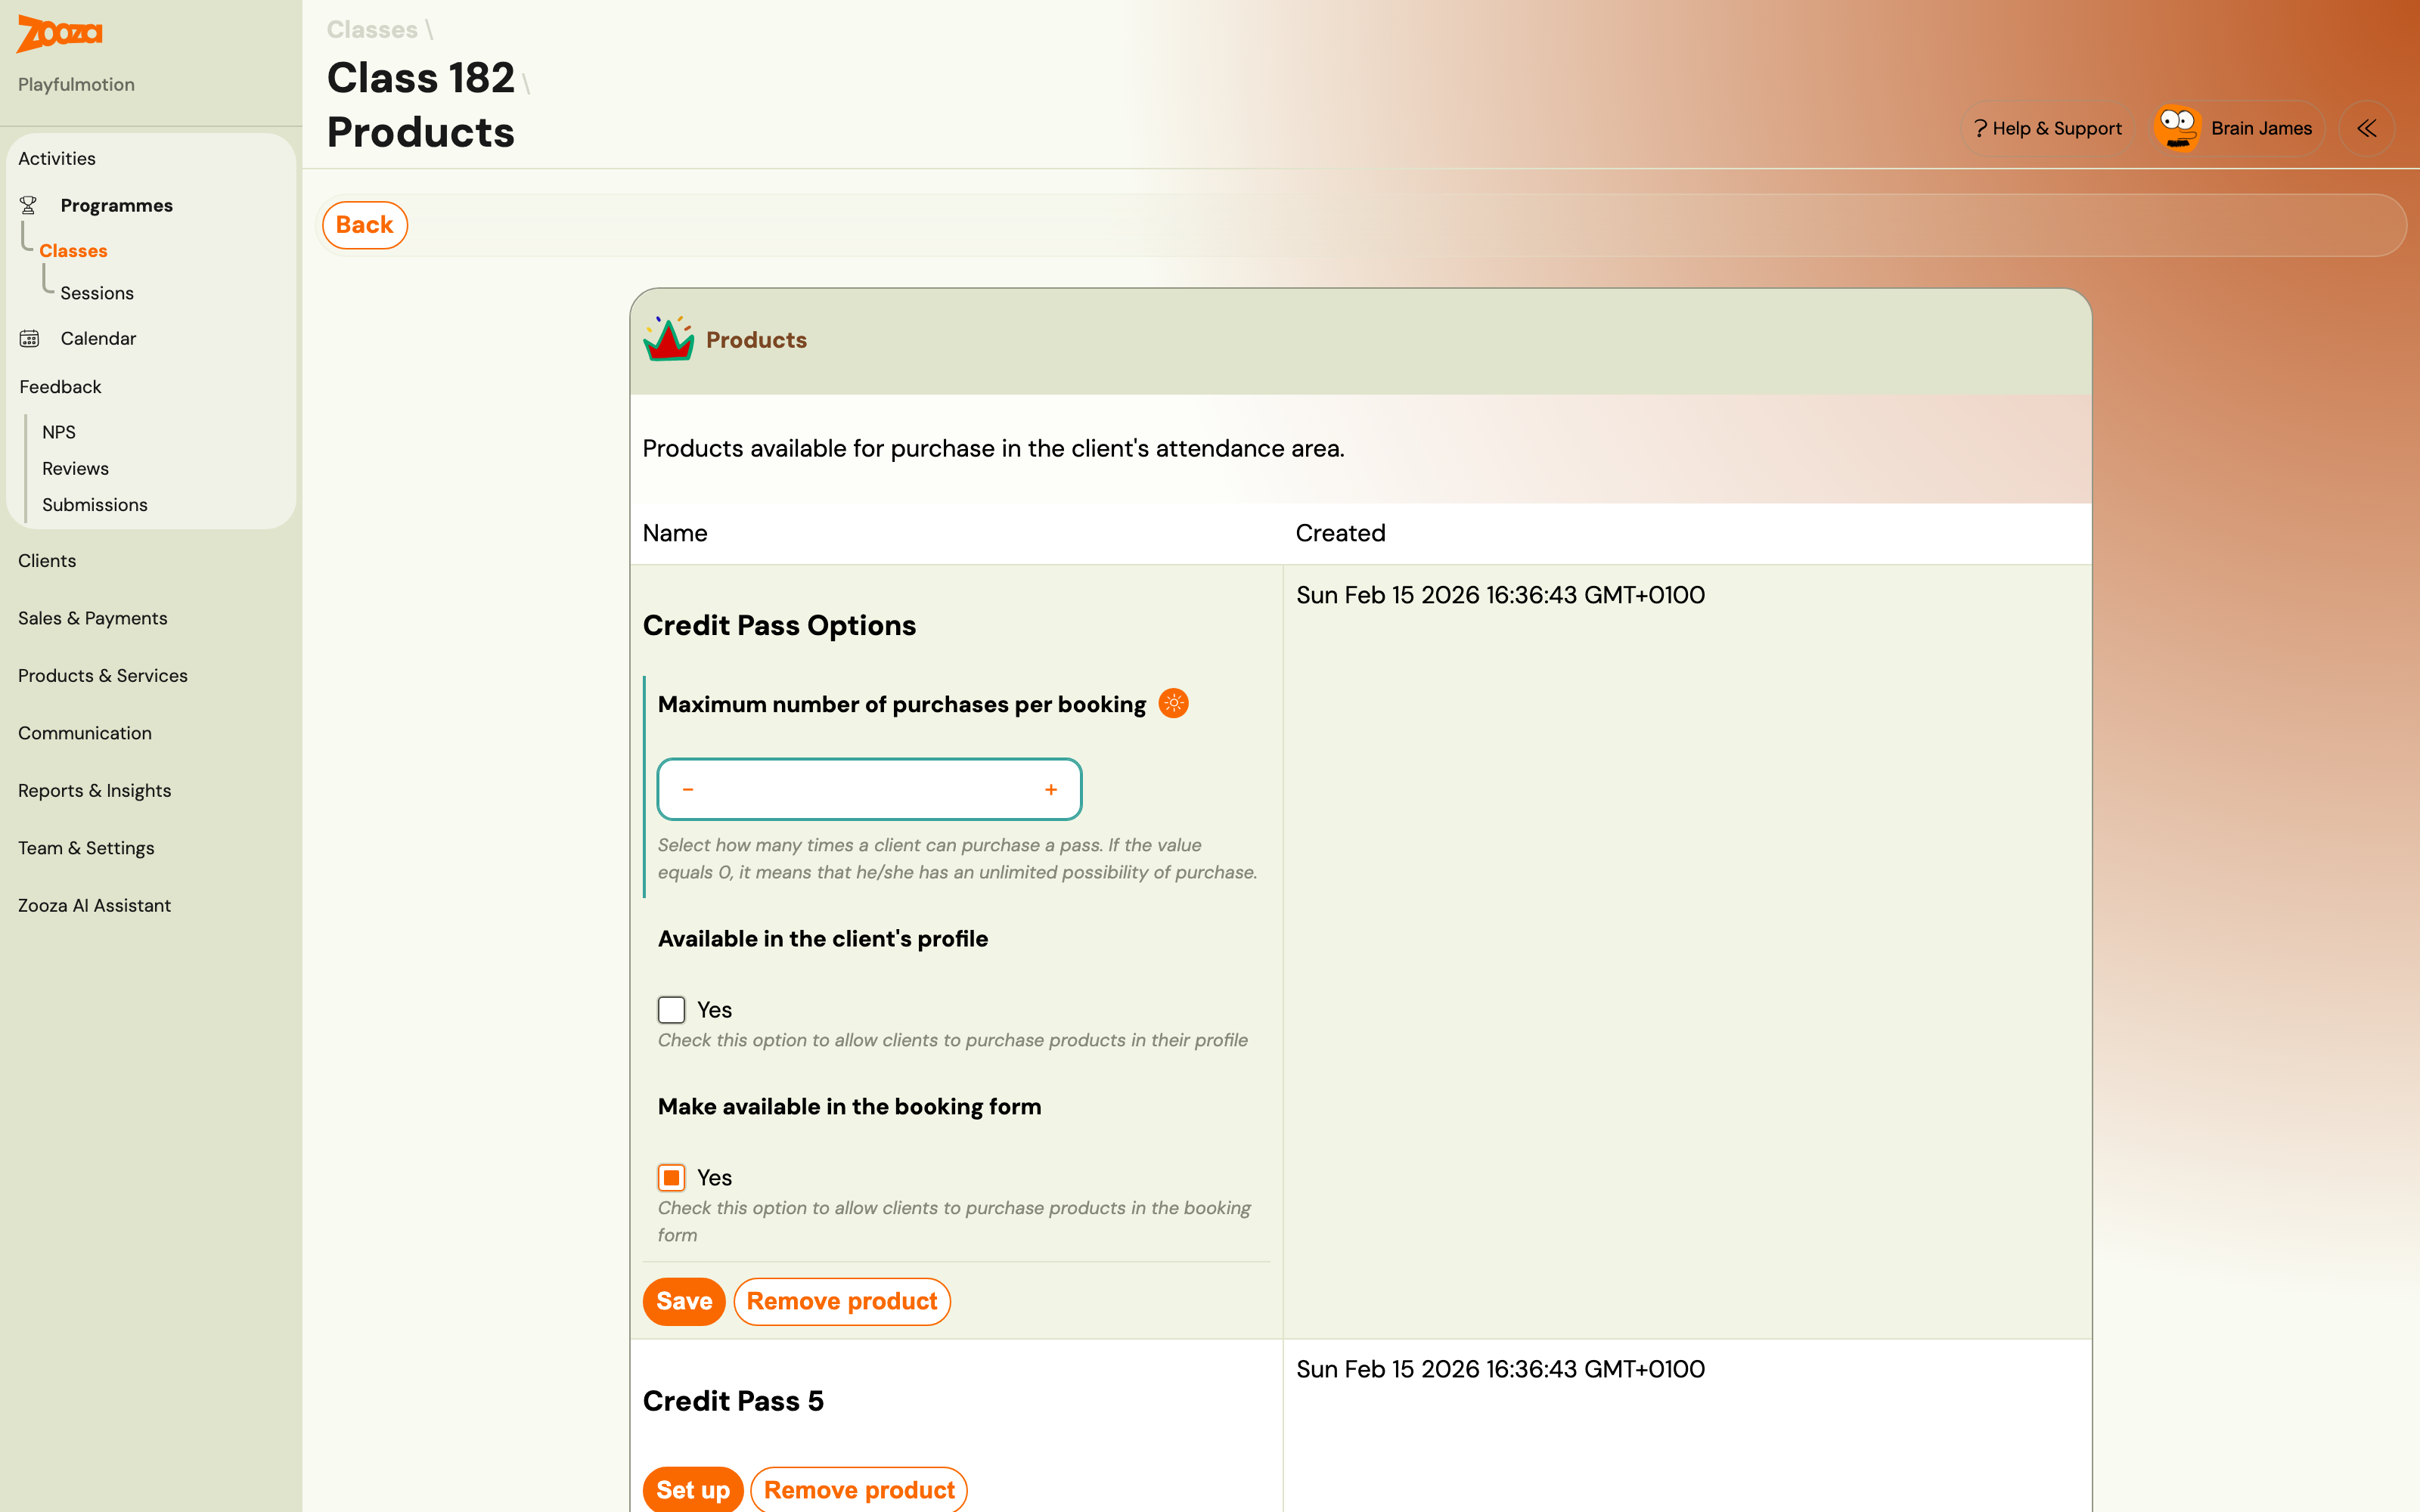
- Maximum number of purchases per booking — how many times one client may buy this pass. 0 means unlimited, which is what an empty field amounts to.
- Available in the client's profile — clients can buy the pass from their profile once they have a booking.
- Make available in the booking form — the pass is offered while the client is registering.
The two availability checkboxes are independent. Tick one, the other, or both — as the picture above shows, this product is sold in the booking form only.
Two-product setup for dual availability
You usually do not need one. The two checkboxes above are independent — tick both on the same product and it is offered in the booking form and in the client profile. One product, one price, one place to edit it.
Create a second product only when you want the two places to differ: a different price in the booking form than in the profile, a bundle offered only during registration, or a pass you sell at the desk but do not advertise to clients.
Example: 5 EUR and 10 EUR passes
To offer two pass values in both places, create two products — a 5 EUR pass and a 10 EUR pass — and tick both availability checkboxes on each. You do not need four.
Client perspective
After enroling for a Pay-as-you-go programme, clients can:
- Purchase an entry pass from their profile (under Orders and in the detail of a booking).
- See their credit balance or remaining entries on their profile home page.
- Book sessions — the pass is automatically redeemed when they book.
- If they cancel the session, the entry or credit is returned.
For a detailed walkthrough of how clients see and use entry passes, see Entry pass — client view.
Related guides
- Pay-as-you-go programme — How to set up the programme type that uses entry passes.
- Linked classes — Use one entry pass across multiple linked classes.
- Selling products during booking — How to offer products in the booking flow.
- Entry pass — client view — How clients see and use entry passes in their profile.
- Pay-as-you-go FAQ — Common questions about entry passes and Pay-as-you-go.