Monitoring auto-enrolment responses
After you send auto-enrolment invitations, clients respond (or don't) from their Client Profile. There are two places to track those responses: the dedicated Auto-enrolment responses page and the Bookings list filter.
Auto-enrolment responses page
Go to Programmes → Auto-enrolment responses, or navigate directly to /#retention_responses.
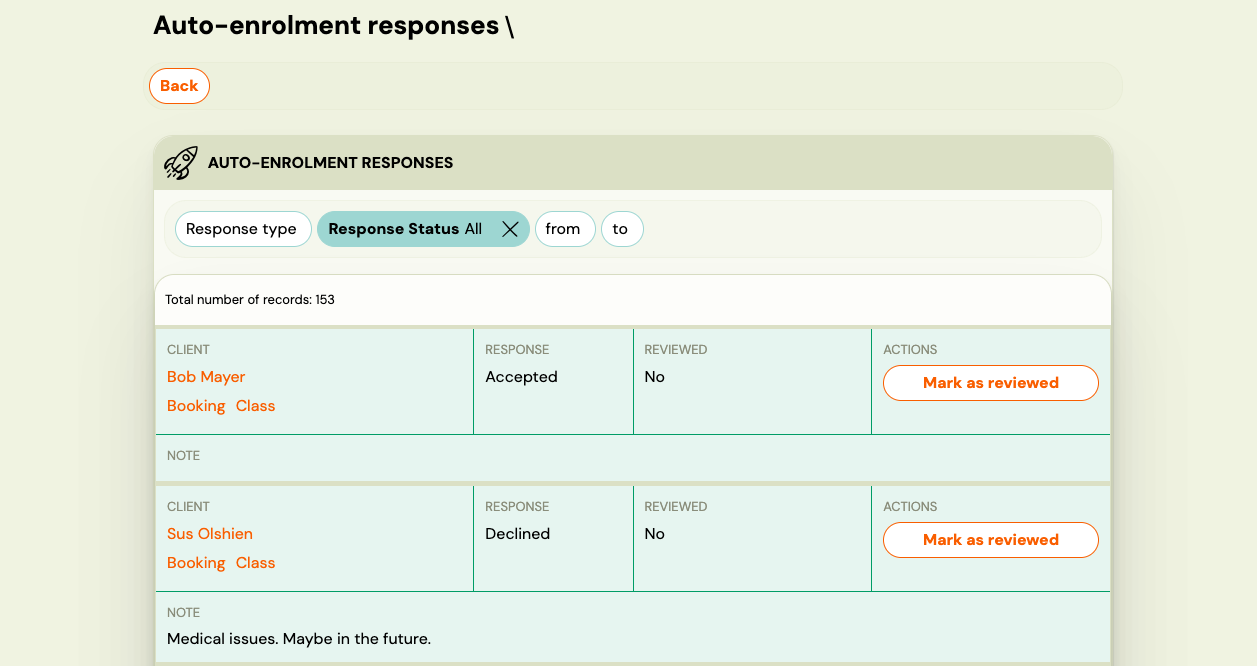
This page shows every client who received an auto-enrolment invitation, grouped with their response status, any note they left, and whether you have already acted on their response.
| Column | What it shows |
|---|---|
| Client | Client name with links to their Booking and Class |
| Response | The client's answer — see statuses below |
| Reviewed | Yes / No — your internal tracking flag |
| Note | Optional reason the client typed when declining |
| Actions | Mark as reviewed button |
Response statuses
| Status | Meaning |
|---|---|
| Auto-enrolment Accepted | Client confirmed they want to continue |
| Auto-enrolment Declined | Client declined — check the Note column for their reason |
| Not decided yet | Client opened the invitation but has not responded |
| (no entry) | Client has not opened the invitation link |
Filters
Use the filters at the top to narrow the list:
- Response type — filter by Accepted, Declined, or Not decided yet
- Response Status — reviewed / not reviewed
- From / To — date range of when the invitation was sent
Mark as reviewed
Mark as reviewed is a personal bookkeeping tool for admins. It sets the Reviewed column to Yes for that row.
It has no effect on the client or their booking. Use it to track which responses you have already acted on — for example, after contacting a client who declined or after creating a booking for a client who accepted.
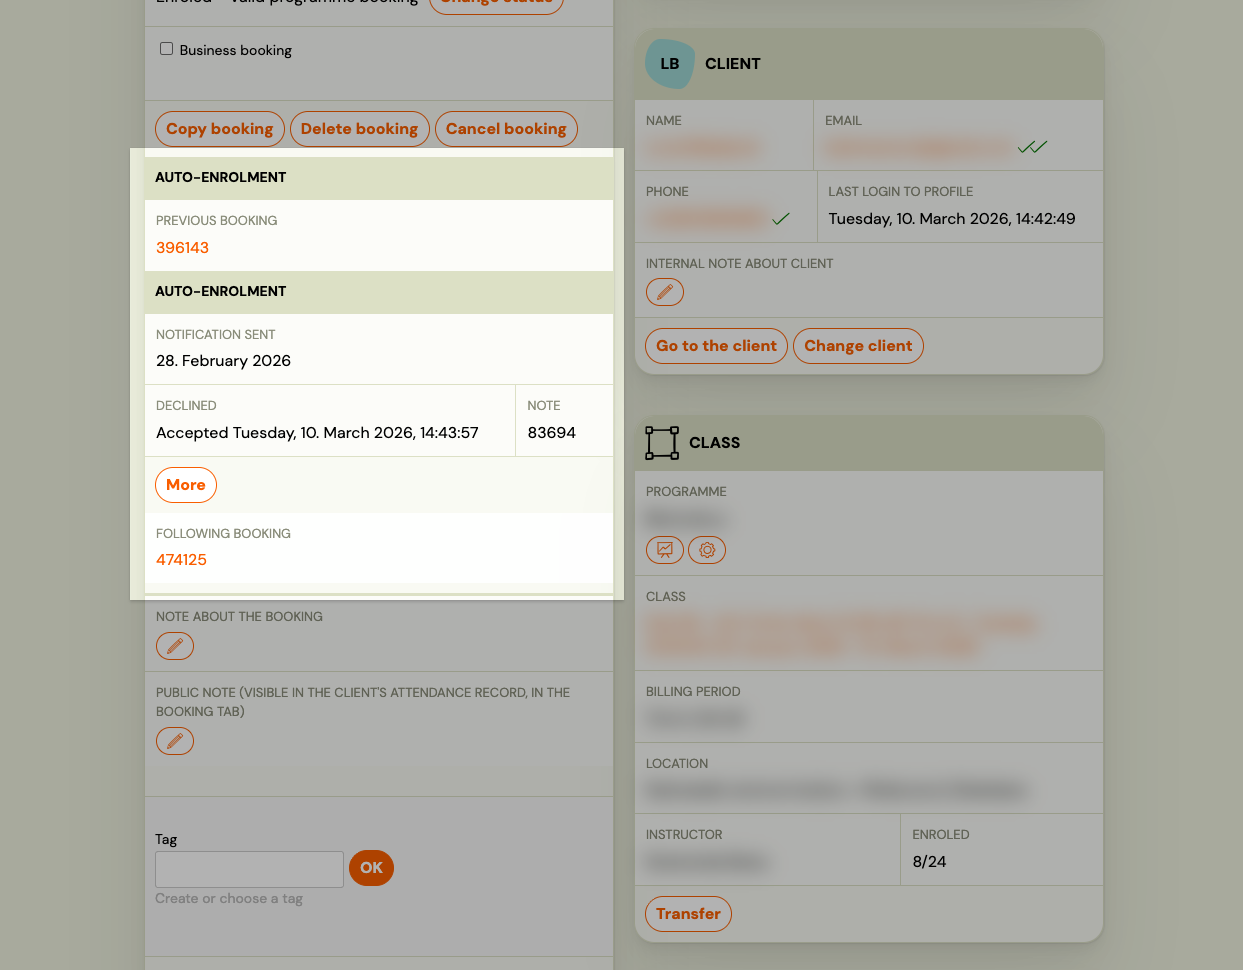
Booking detail
You can also see an individual client's auto-enrolment response directly in their booking. Open the booking and look at the Auto-enrolment field in the booking detail — it shows whether the client accepted, declined, or has not responded yet.
This is useful when you are already viewing a specific client's booking and want to check their status without navigating to the responses page.
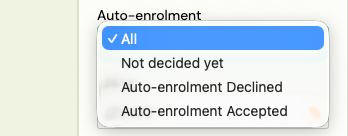
Bookings list filter
The Bookings list (/#bookings) has an Auto-enrolment filter in the sidebar with four options:
- All — no filter applied
- Auto-enrolment Accepted — show only bookings where the client accepted the invitation
- Auto-enrolment Declined — show only bookings where the client declined
- Not decided yet — show only bookings where the client has not responded
This is useful for bulk actions — for example, exporting the list of accepted clients, or sending a follow-up email to those who have not decided yet.
Following up after responses
Client accepted — create a booking in the new class
Accepting an auto-enrolment invitation does not automatically create a new booking. It is the client's signal that they want to continue. You still need to either:
- Let the client complete the booking themselves via the invitation link, or
- Create the booking for them manually: open their existing booking → Copy booking → select the new class.
Client declined — contact them
- Go to
/#retention_responsesand filter by Auto-enrolment Declined. - Check the Note column for their reason.
- Use Communication → Send Email to reach out if needed.
- Click Mark as reviewed once you have acted on the response.
Client has not responded
- Filter by Not decided yet in either the responses page or the Bookings list.
- Send a reminder via Communication → Send Email — select the relevant class as the target and include the programme link.
- Note: auto-enrolment invitations are not re-sent automatically. You must send the reminder manually.